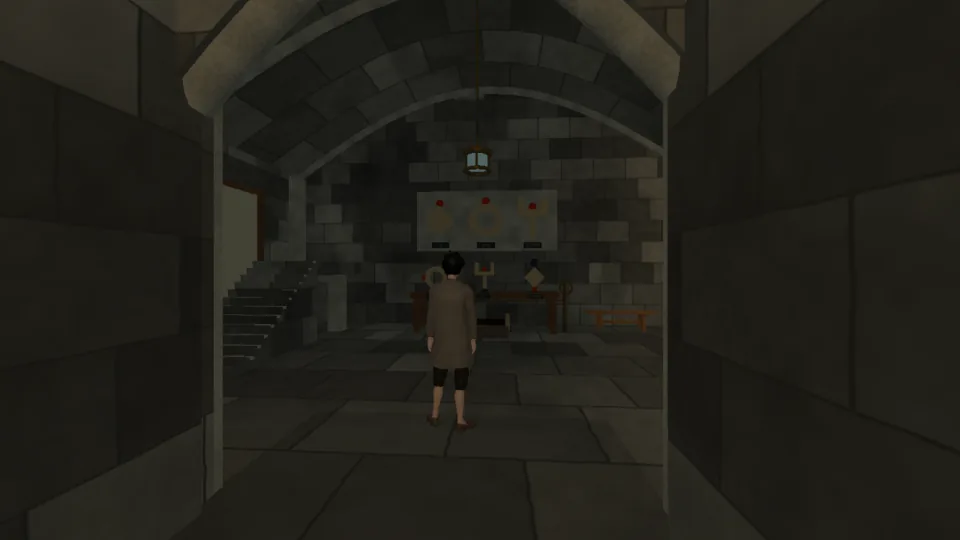
A major room of chapter 1. When you walk in, the room card reads: The rail's ornaments do not answer the frieze above; the archive latch beside the rail holds shut.
Narrated walkthrough
 Narrated video coming soon
Getting there
Chapter 1, ground floor, through the Entrance court's north arch. Solving it raises the gate signed "Shut until the dark frieze is solved" in the passage east of the room; beyond it the winding stair climbs to the sagging gallery.
What is wrong
"The rail's ornaments do not answer the frieze above; the archive latch beside the rail holds shut." The room is darker than most. Three carvings run along the high frieze; three loose ornaments (a ring, a fork and a diamond) stand on keyways in a table rail below. Each ornament must be the same shape as the carving above its rail position and stand upright like it. A small dark plaque with one, two or three brass studs sits under each carving and on the worktop edge below each rail position: the same count marks the same place.
What you can work
- Ring ornament / Fork ornament / Diamond ornament
- The three rail positions, each named after the piece standing in it now. The card says whether its shape and facing match the carving above.
- Archive latch
- A small ring beside the rail. Keyed followers under the rail hold it until all three ornaments answer the frieze.
- Tray
- A soil tray on a low support below the frieze; a light rooted in it can be raised toward the carvings.
- Blossom
- The flame blossom once one is rooted in the tray (works as the tray).
- Wall
- A sheer wall below a maintenance ledge that looks along the frieze from the side.
Solution
A nudge
Place light roots a lasting flame blossom in the soil. Suspend takes the tray's weight off its low support, and each Draw lifts it about a metre, so after two it hangs level with the frieze and lights it.
The full solution
Other ways that work
- No spell at all: the swaps and the X turns need none, and the plaques and ornament cards tell you everything. This is the By Touch Alone route.
- Other light: Handle the Tray to move it between its two lamp positions, Handle the Reading lamp, or open the Reading shutter. Supply liquid (Water + Water + Water) on the Tray quenches the blossom ("Water quenches the blossom and wets its roots."); Heat (Fire + Fire + Growth) relights it ("The blossom dries and its flame returns.").
- Climbing growth (Will + Water + Water) on the Wall: "Frozen holds give a supported approach to the maintenance ledge." The ledge gives a second view along the frieze from the side.
Watch for
- Handling the lifted ornament again sets it back down: "You set the ring ornament back on its keyway." Its own empty keyway also takes it back.
- The names under the crosshair follow the pieces, so after a swap the same position has a new name.
- The latch handled too early answers "The keyed followers still meet the sides of their relief slots."
- Draw on the Tray without Suspend is refused: "The tray drags against its lower support; upward travel needs support." Dismissing the Tray lets it settle back down.
- The room card counts three ornaments; the latch is the fourth repair it names last.
If it goes wrong
- This room has no failed state. To put it back as you found it, hold R for one second (pad: Start, then Restart from autosave); that reloads the autosave made when you entered the room.
Achievements here
- Light on Old Stone: Solve the dark frieze.
- By Touch Alone: By Touch Alone (focused): solve it without casting any spell in this room. Personal spells, Stilling ward and spells on the reading lamp all count. Use only Handle (E) for swaps and X for turns, read the plaques and cards, and Handle the Reading lamp if you want light.
- Light in the Dark: Light in the Dark (aimed): cast Place light here, on the Tray or into the Reading lamp's soil cup. That is a cast, so it rules out By Touch Alone on the same visit; the stalled orrery in chapter 3 also earns Light in the Dark.
- Float and Fetch: Float and Fetch (aimed): the light route's Suspend then Draw on the Tray within twenty seconds earns it.
- A Warm Bath: A Warm Bath (aimed): Supply liquid on the Tray, then Heat on it within twenty seconds (quench, then relight the blossom).
Spells used
Orient, Place light, Suspend, Draw, Climbing growth, Supply liquid, Heat.