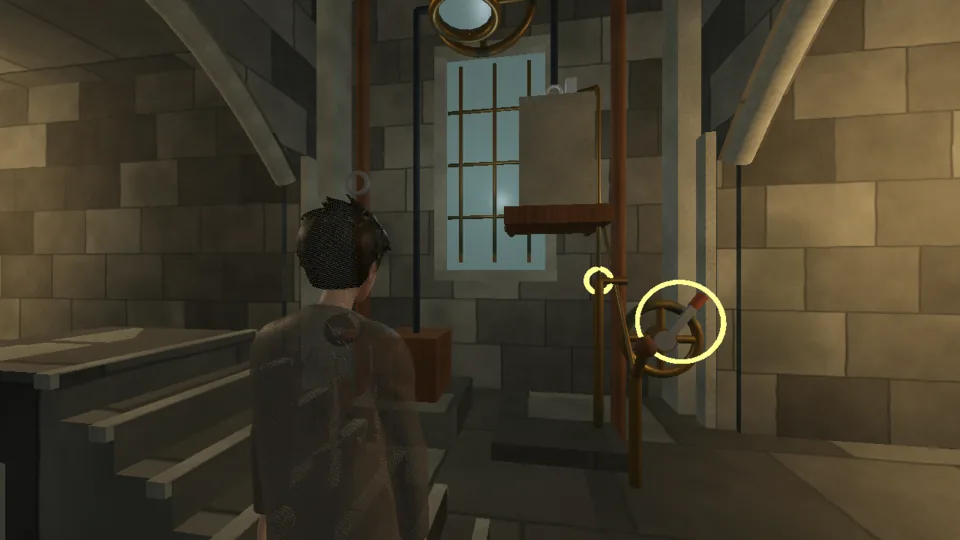
A small room of chapter 1. When you walk in, the room card reads: The supply dumbwaiter sits at the bottom; its counterweight rests on a shelf, off the car's line.
Narrated walkthrough
 Narrated video coming soon
Getting there
Chapter 1, ground floor. Take the Entrance court's east arch; this tall square room comes first, and its east passage leads on to the Bell chamber.
What is wrong
"The supply dumbwaiter sits at the bottom; its counterweight rests on a shelf, off the car's line." Here the room card shows the car's live condition instead, starting with "The supply dumbwaiter's car rests at the lower landing; the weight that should balance it rests on its shelf, off the line." The iron weight is heavier than the loaded car, but its broken eye hangs apart from the car's line.
What you can work
- Counterweight
- The iron weight on its shelf, heavier than the car.
- Connector
- Two broken steel eyes high on the line, the weight's and the car's, hanging side by side.
- Clamp
- An inspection clamp beside the broken ends; closed, it presses them into contact.
- Brake
- The brake lever. It starts on, clamping the winding shaft so nothing moves.
- Service shelf / Service shelf lever
- The shelf the weight rests on (aim above 1.5 m), and the lever that folds it down (aim below).
- Catch
- The landing catch at the top of the shaft, about 2.5 m up; it can carry the car on its own.
- Supplies
- The sealed supply chest riding in the car; it can only be taken out at the upper landing.
- Windlass
- A hand windlass that winds the weight back onto its shelf and the car back down.
- Car
- The dumbwaiter car.
Solution
A nudge
Tether grows a flexible link between two points. While the weight sits on its shelf, its broken eye hangs right beside the eye on the car's line, so the short link reaches.
The full solution
Other ways that work
- Join (Wind + Fire + Fire) instead of Tether: Handle the Clamp first ("The inspection clamp closes and presses the steel ends into contact."), keep the brake on, then cast Join on the Connector or the Clamp: "The contacting steel seam welds; the pan catches the hot runoff." Wait about three seconds for the weld to cool before you free the brake; a hot seam does not carry the load yet. Join is refused with the brake off ("The brake is off, so the line creeps and the seam will not hold still for a weld.") or the clamp open.
- Lighten (Wind + Wind + Will) on the Car is optional: "Upward assistance reduces effective car weight; inertia remains." The car then rises faster.
Watch for
- Do not fold the shelf before the link is made: "The service shelf folds down; loose from the car's line, the weight drops into the catch tray." The dropped eye is then too far away ("The dropped weight eye is beyond the short connector; return it with the windlass first."). Handle the Windlass: "The windlass returns the weight to its shelf."
- Lighten on the Counterweight works against you: it halves the weight's pull, which is then less than the car's weight, so the car stays down. Dismiss it (middle mouse; pad B / Circle on the fitting).
- The Catch refuses until the car is up: "The car has not reached the upper catch."
- A Stilling ward (Wind + Will + Will) cast with the car under the crosshair only slows the car and weight inside its field. It does not change the solution.
- The Reading lamp (Handle it, or Heat it) and the Reading shutter (Handle or Orient it) stand in every room. They only light the room to read by and work none of its fittings.
If it goes wrong
- This room has no failed state. To put it back as you found it, hold R for one second (pad: Start, then Restart from autosave); that reloads the autosave made when you entered the room. A dropped weight needs no restart: Handle the Windlass.
Achievements here
- Counterweight Mended: Solve the Counterweight repair room.