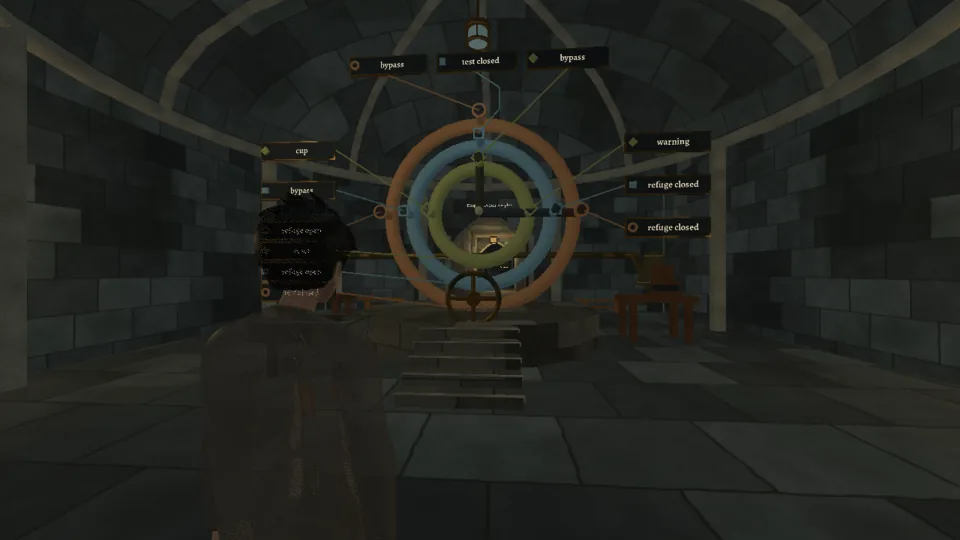
A major room of chapter 5. When you walk in, the room card reads: The ward register keeps the occupied refuge sealed; no one inside can leave.
Narrated walkthrough
 Narrated video coming soon
Getting there
Chapter 5, on the lowest floor, off the Deep protection complex hall through the arch signed The ward register.
What is wrong
Room card: "The ward register keeps the occupied refuge sealed; no one inside can leave." Three concentric selector rings each turn a routing elbow to one of four outlets. The outer ring routes the occupancy channel, the middle ring the heat-test channel and the inner ring the shared warning return. Two hand bellows in the side test bays prove a routing before the release catch will take it.
What you can work
- Outer ring
- Routes the occupancy channel; each turn moves its elbow to the next of four outlets.
- Middle ring
- Routes the heat-test channel.
- Inner ring
- Routes the shared warning return.
- Occupancy test
- A hand bellows that sends a wooden follower through the occupancy track.
- Heat test
- A hand bellows that sends a wooden follower through the heat-test track.
- Release
- The release catch; it engages only after both tests have run a safe routing.
- Face
- The register's sooted front, with wear lines crossing the ring seams (a reading aid).
- Basin
- A dry basin under the register, facing its lit underside (a reading aid).
- Reading lamp
- Optional light to read by.
- Reading shutter
- Optional second light angle.
Solution
A nudge
The elbow on the outer ring has to reach the linkage that opens the refuge. From where it starts, that outlet is two detents round.
The full solution
Other ways that work
- Orient (Water, Will, Will) cast at a ring turns it one detent, the same as a hand.
- Reading aids that never decide the outcome: Cleanse surface (Fire, Water, Water) twice on the Face clears its soot ("Warm runoff carries removable soot into the trough."); Reveal traces (Wind, Fire, Water) on the Face strengthens the wear lines ("Condensation and raking light strengthen existing metal seam edges."); Redirect light (Wind, Wind, Water) on the Basin shows the lit underside and rear service lines ("The reflector redirects the existing lit underside into view.").
Watch for
- Turning any ring again clears both tests. Set all three rings first, then run the tests.
- The rings have four detents and wrap round. If you overshoot one, keep turning.
- The room card names each ring as it comes right, so you can see which ones still owe a turn.
- Once the release has caught, the rings refuse to turn: "The final mechanical catch retains the safe routing."
- Settling this room and the choked cistern brings the closing line: "The student is safe and the ward register retains its tested safe routing. The mechanical campaign is complete; you can continue exploring."
If it goes wrong
- Nothing in this room can fail. The release refuses until the routing is safe ("The tested linkages do not yet open the refuge, isolate the test bay and retain warning.") and until both tests have run ("Both test followers must finish their runs before the release catch can engage.").
Achievements here
- The Register Answers: Solve the ward register.
- The Register by Hand: The Register by Hand: do the whole route above by hand. Outer ring twice, middle once, inner three times, both tests, then Release. Light the Reading lamp by hand if the room is too dim. Any spell the room accepts spoils it, including the reading aids, a Stilling ward, Heat on the lamp, Orient on the shutter, or Boost jump, Hasten, Rising draught or Short traverse cast inside the room. Casts at furniture and casts that shed or unravel do not count.
- Clean Slate: Clean Slate: cast Cleanse surface at the Face, then Reveal traces at the Face within 20 seconds. Both are accepted at any time, but they are casts in this room, so do not combine this with The Register by Hand on the same visit before the release.