The third trial. The Houndmaster has 1,800 health and stays in the middle of his kennel, an octagon 34 m across with a kennel in each of its eight walls. He never fights alone: armoured war-hounds hunt every hero from the first second, more of them every 30 seconds, and four brass whistle posts stand on alternating corners for you to use against it. He winds up one action at a time, the newest ability first. Every hero has 100 health, so his numbers below read as percentages.
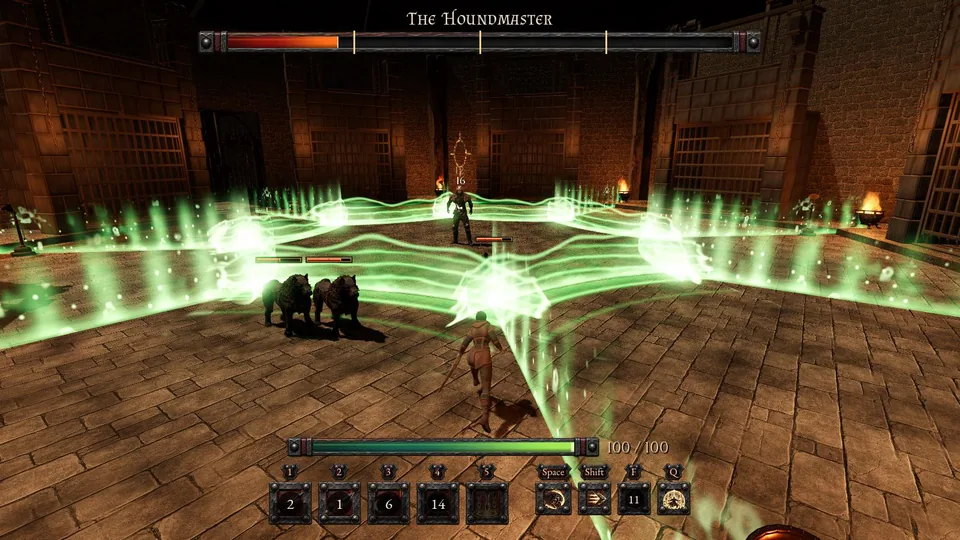
The video is one whole fight played by the game's test player as a female Hunter, a class no other boss guide uses: the Houndmaster fell in under two minutes, the Hunter was never hit, and she killed no hound, so four were still alive at the end. Each boss guide draws its own hero, so every class gets its turn.
The abilities, in the order they arrive
| From | Ability | How often | Damage | Answer |
|---|---|---|---|---|
| 100% | Hounds | one more per hero every 30 s | 10 per snap | Step aside or walk away while it growls, or roll |
| 100% | Whistle posts | each rests 15 s for you after it rings | none: stuns your hounds 5 s | Ring one with the hounds close, then hit him |
| 75% | Chain Lash | about every 12 s | 20 and a 1 s stun; the chains then slow | Stand between the lines, or roll |
| 50% | Chain Spiral | about every 20 s | 40 and a 1 s slow | Step out of the hooked head's path, or roll |
| 25% | Kennel Howl | about every 25 s | 55 | Blink through the wave, or immunity |
An ability that has just joined the fight is used as soon as he is free, so each threshold is followed almost at once by its new attack. The name of whatever he is about to do appears under his health bar.
Hounds
At the start one armoured war-hound per hero runs out of the next kennel in turn and hunts that hero only, always facing it. Every 30 seconds one more hound per hero comes out, whether or not the earlier ones died, so hounds you spare stack up into a pack; the next kennel's gate rattles 2 s before each release. A hound gallops at 8.5 m/s, faster than a hero's 7, so you cannot walk away from it. Within 2 m it growls for 0.6 s and gathers itself to bite, closing at only 4 m/s, slower than you walk; then it snaps for 10 physical and needs 1.2 s to recover. Nothing is drawn on the floor: the growl and the gathering bite are the warning. Step aside or walk away during the growl, or roll: the bite is physical. A hound never starts a growl while the Houndmaster is winding up an attack, or while its hero is stunned. A hound has 200 health. A stunned hound lies down on its belly with stars wheeling over its head.
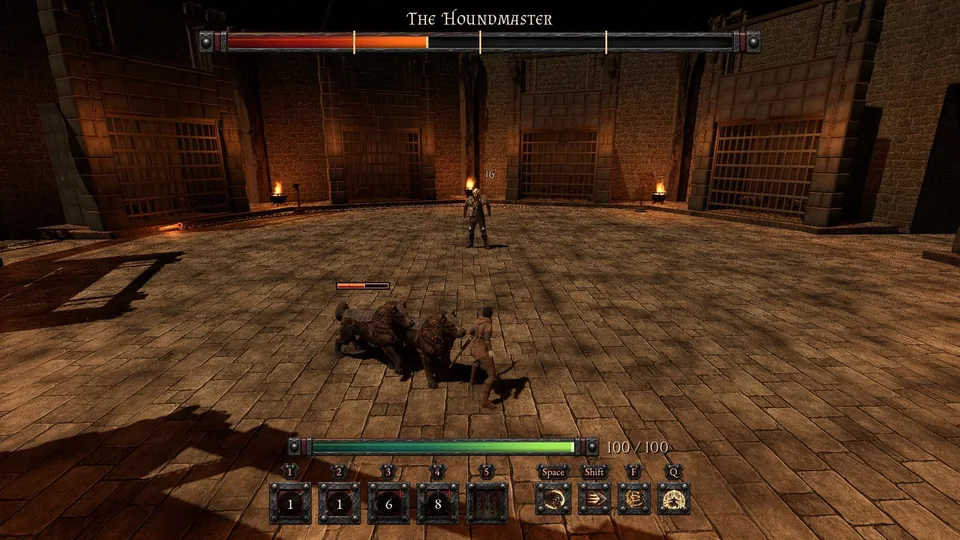
Whistle posts
Any hit from a hero on one of the four whistle posts, a spell or a weapon, rings it and stuns every hound hunting that hero for 5 seconds. The post then rests for 15 s for that hero only: its bell dims and its dial turns once round. Ring a post when your hounds are close, hit the Houndmaster while they lie stunned, then make for the next post. Spells go to whatever the camera looks at: a hound or a post within 10° of the aim, otherwise the boss. A spell that hits an area hits everything in it, hounds included.
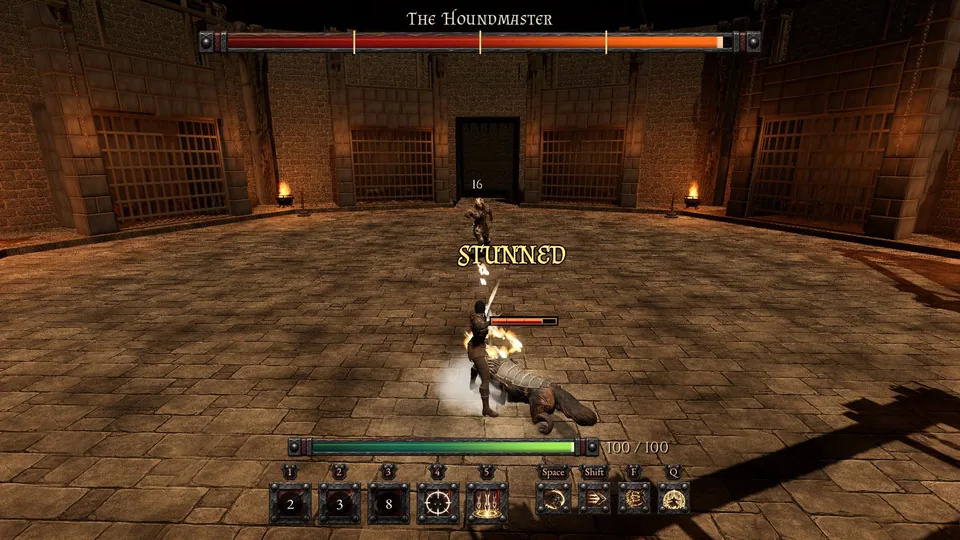
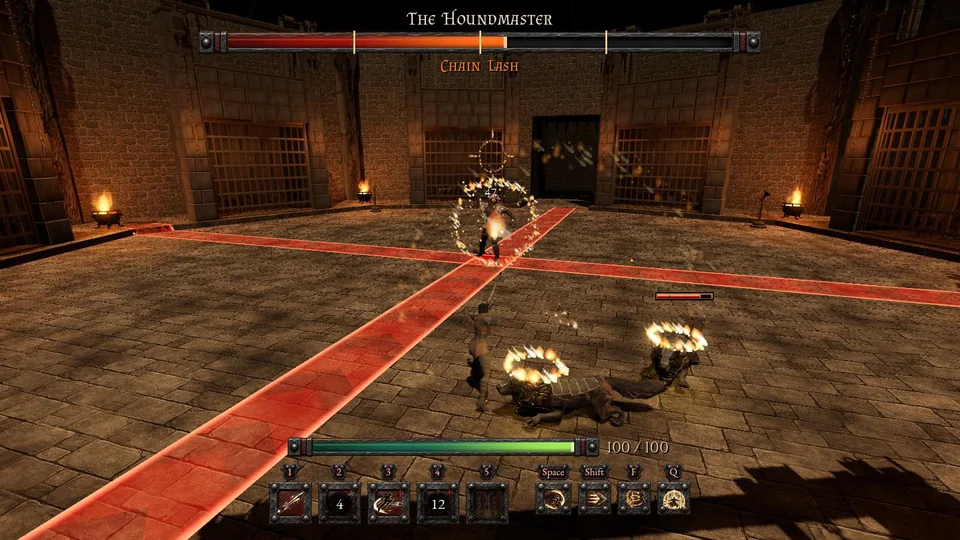
Chain Lash (from 75%)
Four lanes 1.6 m wide are marked from under him to the walls, a quarter turn apart, at a random turn: two full red lines crossing beneath him. One second later rusty chains whip down them: 20 physical and a 1 s stun to any hero in a lane. A roll dodges both. The chains then lie on the floor for 3 seconds and slow heroes by 40% (hounds are not slowed), so do not cross them in a hurry. A hound caught in a lane takes 50 and the same stun: lead yours across a line before the chains come down.
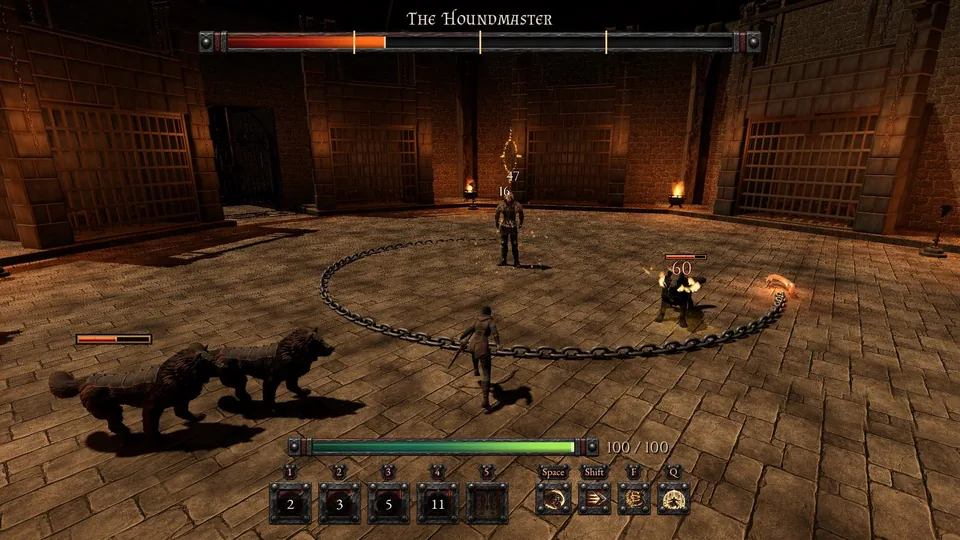
Chain Spiral (from 50%)
After a 1 s wind-up he spins and throws one chain of dark forged iron that draws itself outward as a spiral: three turns from 1.5 m to the walls, a band 2.2 m wide, its hooked head travelling at 16 m/s, about 11 s from his feet to the walls. The release angle is random but the shape never changes. Nothing is marked on the floor: watch the hooked head and step out of its path as it comes round. It hits each hero once, for 40 physical and a 1 s slow of 50%; a roll dodges both. Behind the head the chain sinks away harmlessly. Hounds take 60 and a 1 s stun.
Kennel Howl (from 25%)
The hounds in all eight kennels howl. After a 1 s wind-up a rippling green wave runs out from every kennel at 6 m/s; where two waves meet they cancel, leaving a glowing seam that lingers and fades, so every spot is swept exactly once, by the wave of its nearest kennel. It deals 55 nature damage, which a roll does not dodge, and you cannot walk out of its way. Blink through the front onto floor it has already crossed (blink's 11 s cooldown is always ready again before the next howl, 25 s later), or use immunity.
Achievements
Besides the shared no-damage achievement, this trial has two challenges of its own. In a group, every hero must keep the condition.
Put Down
No hound is alive when the Houndmaster dies.
Good Dog
No hero kills a hound. A hound killed by his own chains does not count against you.
The two pull against each other, so they are usually earned in different fights. Because a new hound comes for each hero every 30 seconds, Good Dog means fighting on with a growing pack: keep it lying down at the whistle posts. The fight in the video earned Good Dog: the Hunter aimed at him and at the posts, never killed a hound, and ended with four alive.
Tips
- Learn where the posts are before 75%: the whistle loop is what keeps the hound off you for the rest of the fight.
- From 25%, keep blink for the howl; the roll answers the bite, the lash and the spiral.
- Area spells kill hounds on the way to the boss. Killing them keeps the pack small; for Good Dog aim at him and let the whistle do the work instead.
- Immunity (1.5 s, 45 s cooldown) answers any one ability, including a howl that catches you with blink cooling down.